
 Canadian Dollar (CAD)
 Euro (EUR)
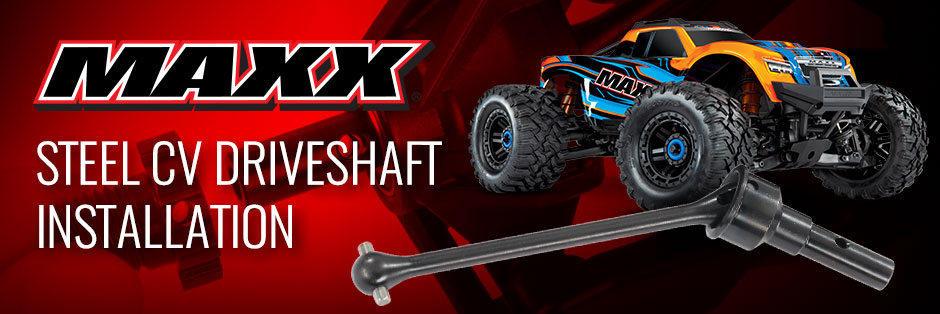
Upgrade Your Maxx® to the Toughest Steel Driveshafts Available
 8950X Steel CV Driveshafts
 7758 and 8654 Aluminum Hubs and Nuts
WideMaxx® Suspension Kit
If you've already upgraded your Maxx to the superior handling of the WideMaxx kit, don't worry, we've got you covered! There's a set of steel CV driveshafts made specifically for the WideMaxx suspension kit 8996X. The installation works exactly the same as the standard steel CV driveshafts so this is a great how-to guide for WideMaxx owners also. Get your wrenches out and let's get to work!
Getting Started
To install the driveshafts, you’ll need an 8 mm nut driver, 2 mm and 2.5 mm hex drivers, and a 17 mm wheel wrench 5480X. You can use the tools supplied with the Maxx, but for faster, easier wrenching, we recommend the 8712 7-Piece Metric Hex and Nut Driver Essentials Set. This set includes all the hex- and nut-driver bits required to work on all Traxxas models, plus a convenient carrying and storage pouch. Though not required, the 8716 ball-end driver set is also recommended.
 Hex and Nut Driver Essentials Set
 Ball-End Speed Bit Set
 17 mm wheel wrench
| |
| Required Tools |
| |
|
| |
| |
1) Begin by removing the wheels using an 8 mm nut driver or the wrench supplied with the Maxx. Remove the 4 mm screw pins (arrowed) to release the front steering hub and rear axle carrier. Also remove the 3x18 mm button-head that secures the steering link to the steering block.
 Remove the wheels
 Unscrew the Steering Blocks
 Unscrew the Axle Carriers
2) Remove the steering block and rear axle carrier. The female halves of the driveshafts will come out with them.
 Remove the Steering BlocksRemove the Axle Carriers
3) Remove the wheel hex. If necessary, use a flat-blade screwdriver to carefully pry the wheel hex away from the cross pin. Remove the cross pin, then slide the stub axle out of the steering hub or axle carrier.
 Remove the Wheel Hex
 Remove the Stub Axle
4) Remove the 16x6 mm bearing and replace it with the 16x8 mm bearing supplied with the CV driveshafts.
 Remove the Bearings
 Use the New Bearings
5) Install the supplied 23x17 mm ball bearing onto the CV driveshaft’s stub axle, them press it into the hub carrier or steering block. The bearing should fit flush as shown.
 Install the Bearings
 Press Assembly into the Hub
 Ensure Bearing is Flush
6) Remove the male driveshaft half by removing the screw pin that secures the universal joint. You can remove the screw pin more easily by using a ball-end 2 mm driver instead of a straight-tip driver. After removing the screw pin, simply slide the universal joint off of the shaft.
Next, install the drive cup included with the CV driveshafts by reversing the steps you used to remove the plastic shafts. Be sure to use the news screw pins supplied with the CV shafts. The new pins have a patch of blue thread-locking compound on them to prevent loosening. Again, a ball-end 2 mm driver is recommended. Insert the driver through the suspension arm for easiest access. Note: in these photos, the shock absorber has been removed for clarity; you do not need to remove the shock from your model.
 Remove the Driveshaft
 Install the Drive Cup
 Install the Drive Cup
7) Slide the driveshaft’s “dogbone” into the drive cup, then reinstall the 4 mm pins. When reinstalling the steering block, remember to also reinstall the 3x18 mm button-head screw that secures the steering toe link (see Step 2). Note: in these photos, the shock absorber has been removed for clarity; you do not need to remove the shock from your model.
 Insert the Dogbone
 Reinstall the Pins
8) Slide the aluminum wheel hub onto the stub axle, and align the holes in the hub and axle. Insert the cross pin to secure the wheel hub. Press the pin in until it is flush, as shown. Repeat steps 2-8 to install the remaining three driveshafts.
 Install the Wheel Hub
 Insert the Cross Pin
 Ensure Pin is Flush
8) Now you can remount the wheels using the 17 mm aluminum nuts. The wheel washers and 8 mm nuts removed in Step 1 will not be used. Tighten the nuts with a 17 mm wheel wrench, and your Maxx is ready for action!
 Use 17 mm Aluminum Nuts
 Tighten Nuts Down
For more helpful Traxxas how-to videos, be sure visit the Traxxas Support channel, Like, and subscribe. Click here to go to the channel now.