How to get the Most Performance from Your 50+mph Speedboat


| |
| Parts List |
| |
| |
| |
Telemetry Installation
Traxxas designed the M41 to be telemetry-ready from the start, so it’s easy to add the Telemetry Expander and sensors. We’re installing the 6553X Telemetry Expander 2.0 which includes the GPS module. The expander is also offered without the GPS module (6550X). To allow the TQi transmitter to interface with the Traxxas Link app, you’ll also need the 6511 Traxxas Link Wireless Module, sold separately.
 6550 Telemetry Expander
 6551 Telemetry Expander with GPS module
Remove the electronics tray and motor to make telemetry installation easier. After unplugging the water-cooling tubing and motor wires, you only need to loosen two screws to release the electronics tray. The screws pull on catches that hold the tray in place, so you don’t need to remove the screws entirely—just loosen them. With the tray loosened, tilt it up and pull it away from the hull.
 Removing the electronics tray
 Loosen the two tray screws
 Lift out the electronics tray
Use the included 10 mm wrenches to loosen the flex shaft coupler, then pull the prop out a few inches to free the cable from the coupler. Remove the screws that secure the motor mount to the hull.
 Loosen the flex shaft coupler
 Remove the motor mount screws
The RPM trigger magnet slides into the holder with the magnet’s red-dot side facing the motor. Remove the coupler from the motor shaft, slide the magnet holder into place, then secure it with the coupler.
 The red dot faces the motor
 Secure the magnet holder with the coupler
The temperature sensor mount makes certain the sensor’s thermistor is pressed firmly against the motor for accurate readings.
 Temperature sensor mount
 The thermistor presses against the motor
Use the included zip-tie to mount the temperature sensor, then slide the RPM sensor into the motor mount and secure it with the supplied screw.
 Secure the temperature sensor with the zip-tie
 Insert the RPM sensor into the motor mount
The electronics tray has bosses for the Telemetry Expander. Use the supplied screws to secure it. Open the Telemetry Expander and plug in the communications cable and temperature sensor. The sensor can be plugged into any of the smart-sensor ports.
 Secure the Telemetry Expander
 Open the expander box
 Expander port diagram
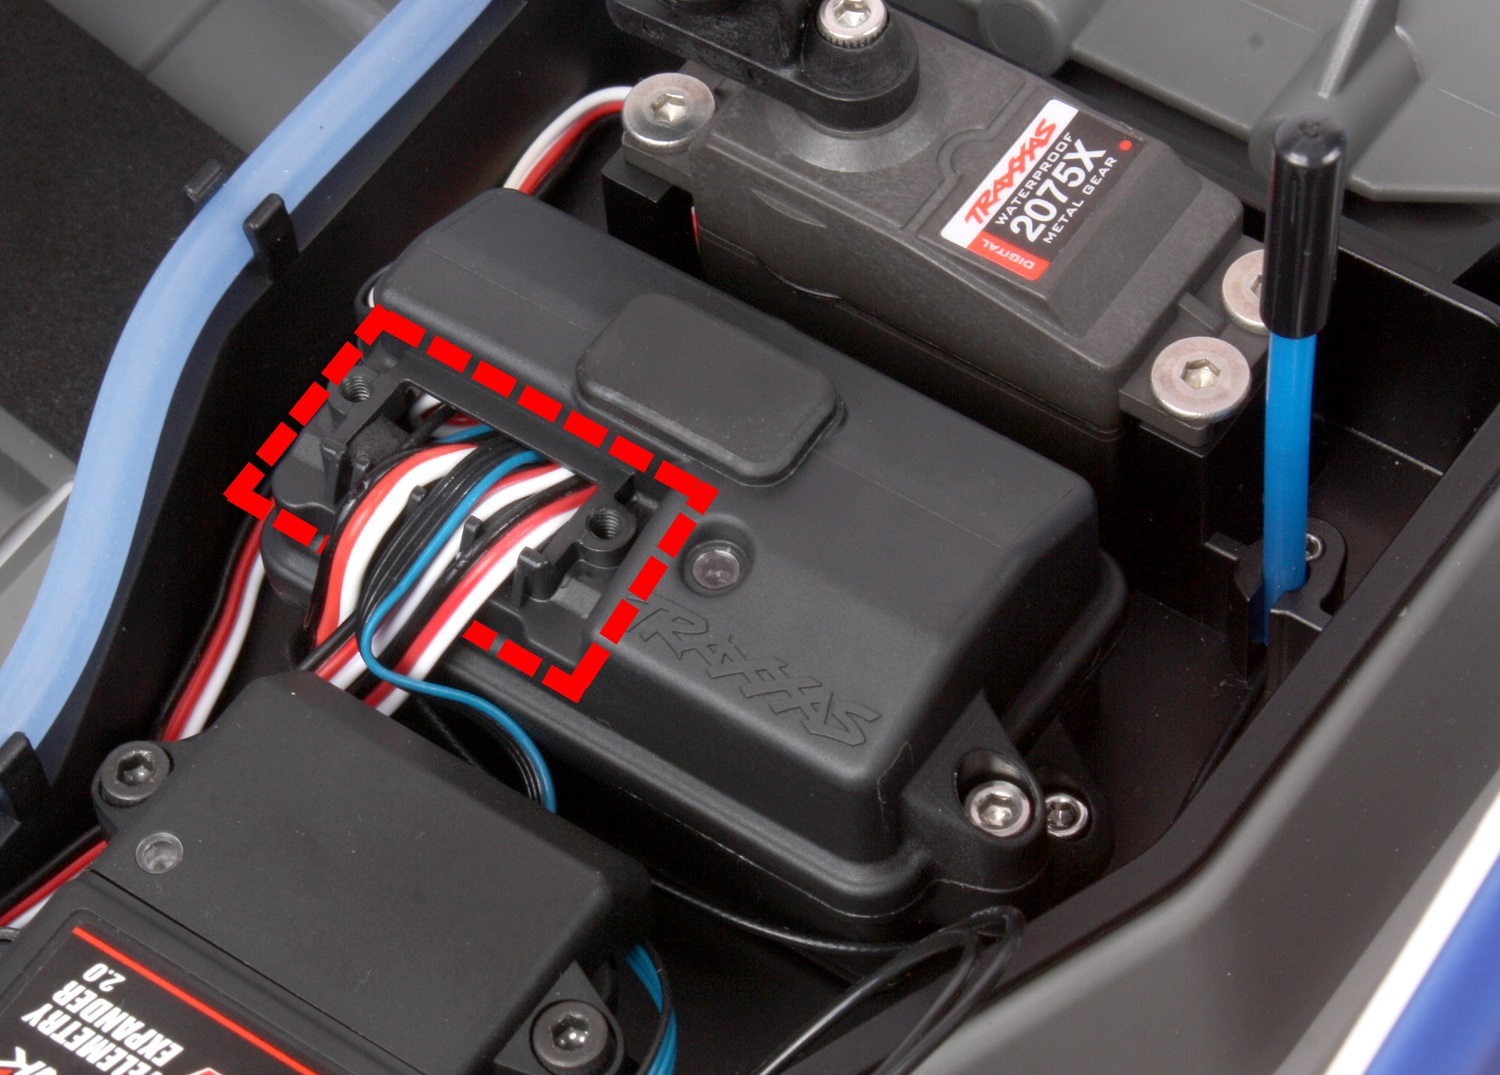
You’ll need to open up the waterproof receiver box to plug in the telemetry expander’s communication cable and the RPM and voltage sensors. If you’ve never opened and resealed a receiver box, watch this video to see how it’s done and keep it watertight. Follow Traxxas Support for the latest how-to and technical videos.
 Open the waterproof receiver box
 Plug in the communication cable and RPM sensor
Bonus Upgrade
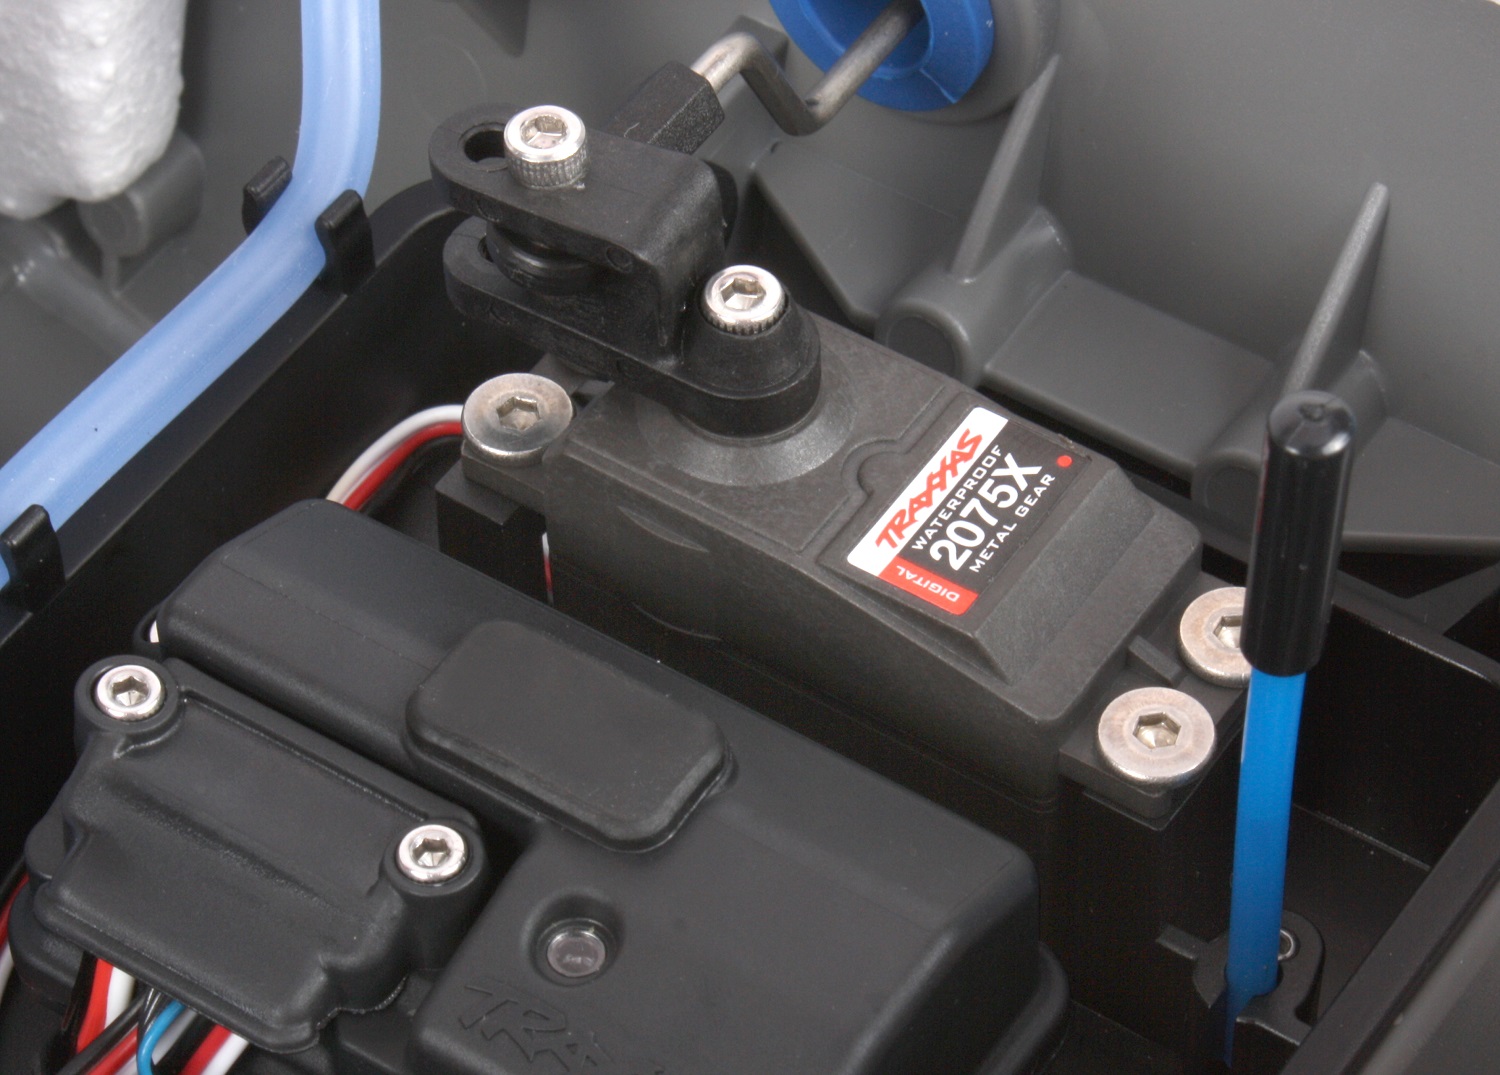
While we had the receiver box open, we took the opportunity to upgrade to a 2075X High Torque servo for metal-gear durability and a 56% boost in torque.
 2075X megal gear servo
 The 2075X provides a 56% boost in torque
 Telemetry installation complete!
Activating Telemetry
The M41 is now ready to send telemetry data to the TQi transmitter. To see the data, we need to install the Traxxas Link Wireless Module so the transmitter can communicate with our smart device and the Traxxas Link app via Bluetooth.


After loading the app, follow these steps to connect to the TQi transmitter. If you get a message that the app wants to update the TQi’s firmware, just follow the on-screen instructions. After updating, you can power-up the M41 and choose your dashboard layout. When selecting sensors for the gauges, be sure to tap the “Refresh” button on the selection screen to make sure the app “finds” all the installed sensors.


Transmitter Phone Mount
Once you've added telemetry to your boat, you'll wonder how you ever got along without it. Not only can you check speed and RPM, but you can keep an eye on temperatures and battery voltage to know when it's time to head to shore. The 6532 Transmitter Phone Mount attaches to your Traxxas transmitter and holds your phone securely in place with spring-loaded clips. Get telemetry readings the easy way with this super-helpful accessory.
Installing Aluminum Trim Tab Adjusters
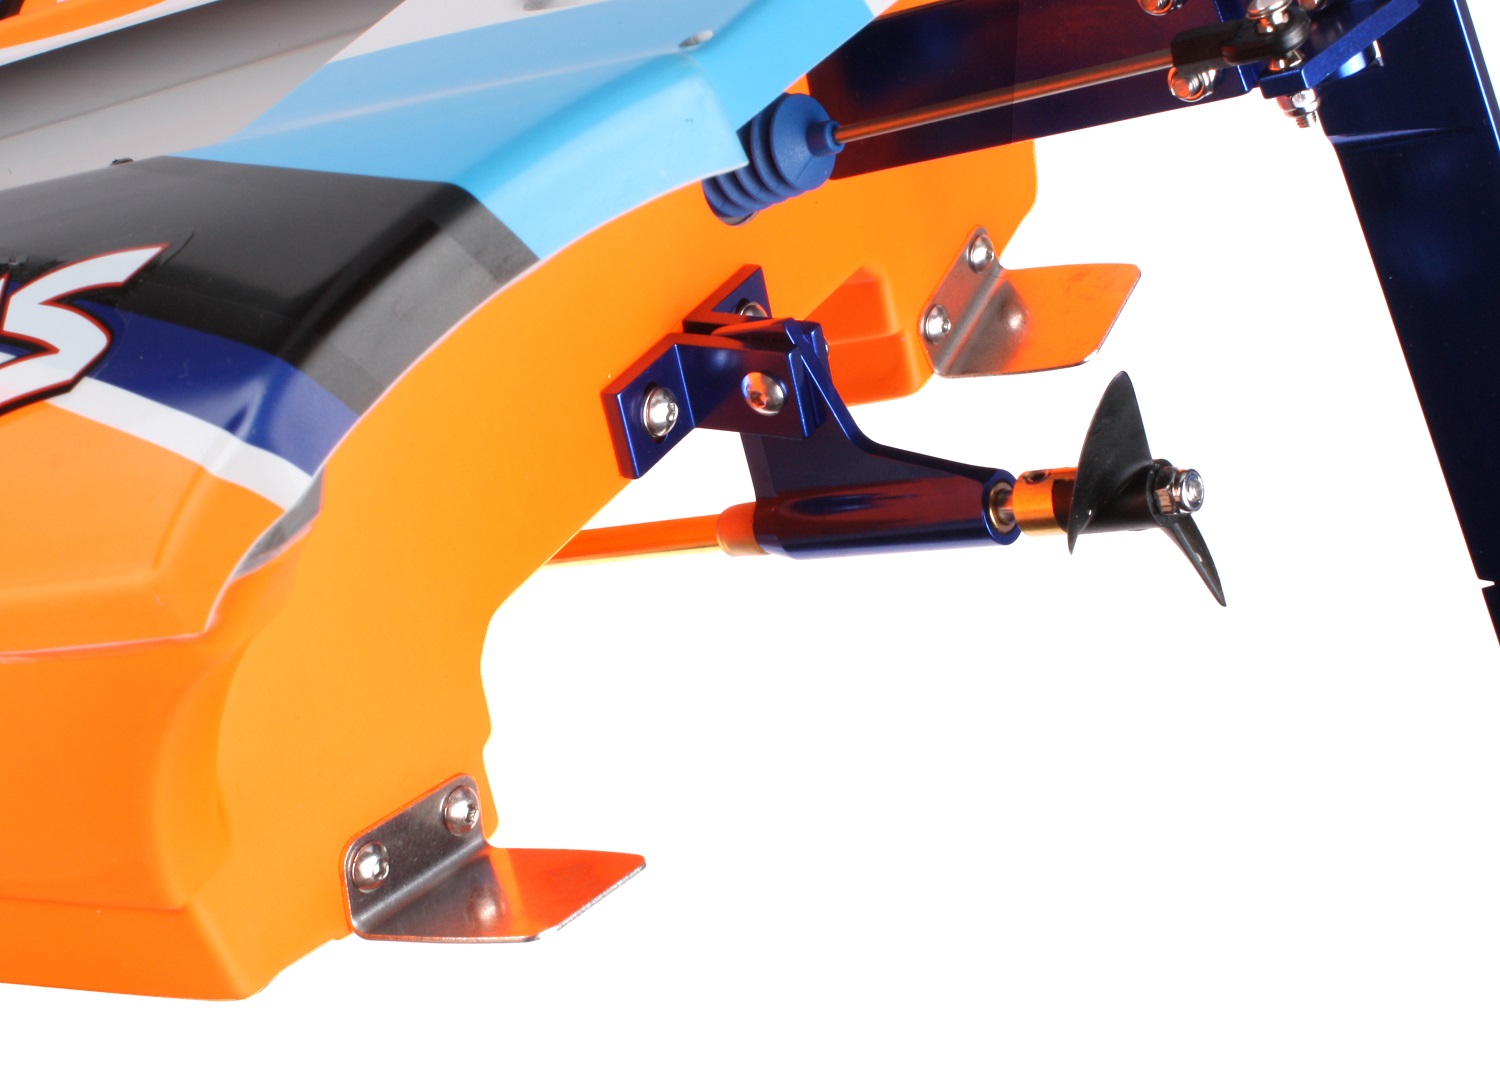
Before we hit the water, we’ll make a very quick hull mod and install the 5731X machined aluminum trim tab adjusters. These simply fit over the stainless-steel trim tabs and allow you to set tab angle by threading the adjusting screw in or out.


Threading the screw in pushes the tab down, which will reduce how much the bow rises out of the water at speed. This is useful for improving stability rougher water conditions.
 Stock trim tabs
 Trim tab adjusters installed
 Turn the screw to adjust
From the factory, the trim tabs are set level with the hull bottom for best all-around performance and stability. Threading the screw into the adjuster will flex the tab down and lower the bow. A change of just 1 mm makes a difference.

Adding telemetry to the M41 makes this big boat even more exciting. GPS speed lets you tell the crowd at the pond just how fast your last pass was down to the decimal point, and you can even see how many RPM the prop was turning. How hot’s the motor? You’ll never have to wonder when it’s temperature is displayed in real time—you can even set a warning alarm if the temperature exceeds the maximum you choose. Traxxas makes it easy!

Check out some of the helpful Traxxas how-to videos on the Traxxas Support channel, Like, and subscribe. Click here to go to the channel now.


 Canadian Dollar (CAD)
 Euro (EUR)
