
 Canadian Dollar (CAD)
 Euro (EUR)
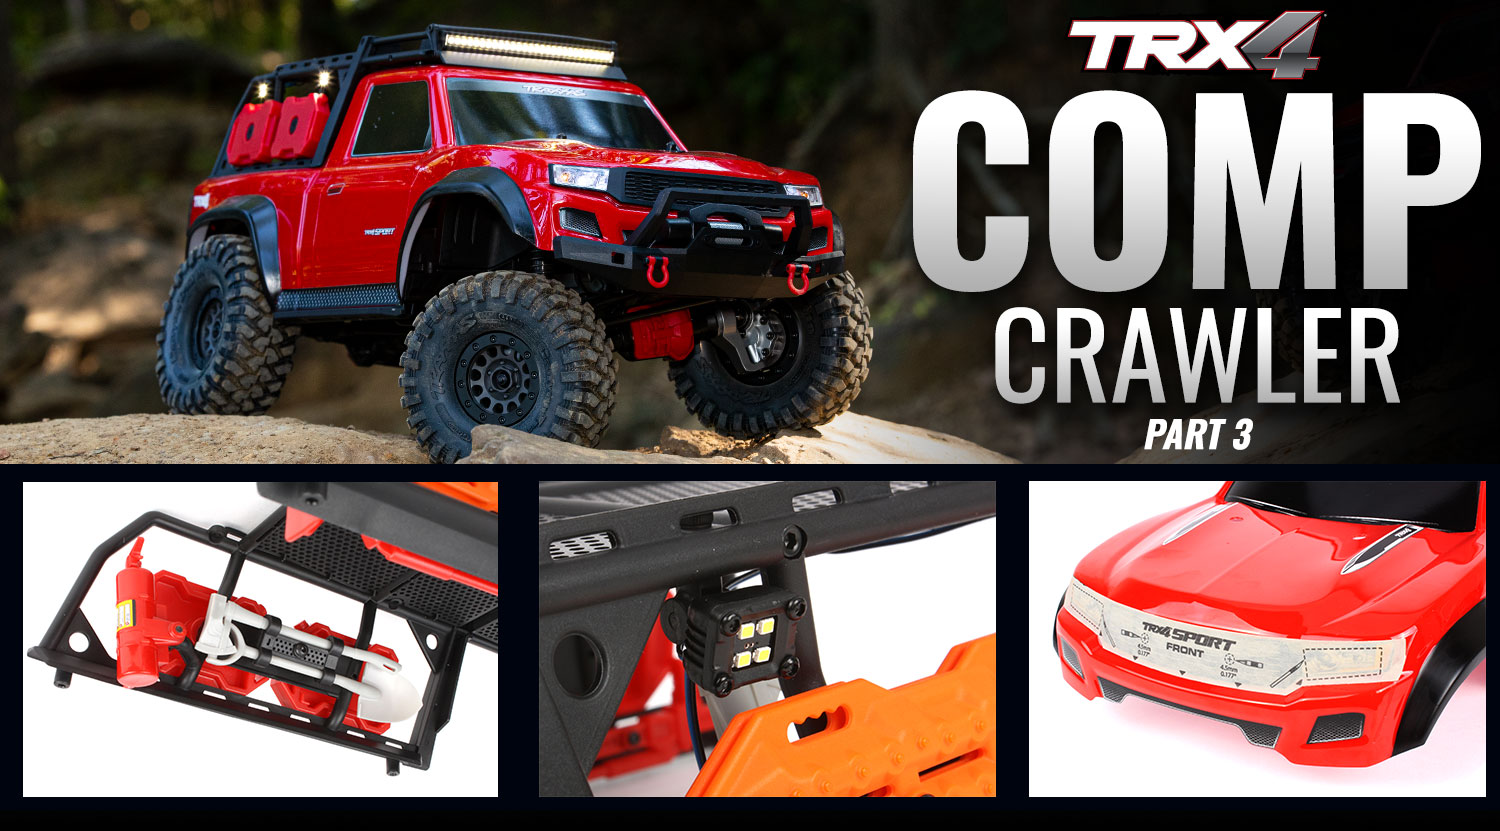
Part 3: Adding Scale Accessories
| |
| Part 3 Build List |
| |
| |
| |
View the Full Line of TRX-4 Sport Accessories
Scale Detail
Depending on the comp and the class you run in, scale detailing can earn you points—take a look at the Scale Off-Road RC Association’s (SORRCA) rules, for example. Plus, more detail = more fun, and Traxxas makes it easy to trick out the Sport. The 8120X Expedition Rack arrives assembled and loaded with accessories (you can also get it minus the accessories as 8120).


Two fuel jugs, an axe and shovel, jack, fire extinguisher, and two traction boards are all bolted into place and offer plenty of opportunity for extra detailing with paint and weathering if you really want to get into it. Traxxas also offers the 8086 “scene light kit” specifically for the rack, which we also installed.


Stick-on templates show where to drill the mounting holes, so installation is goof-proof. The scene light kit mounts four, 4-chip LED units on the sides of the rack. Wire-routing clips and channels molded into the rack make the installation look totally factory. The LED units can be rotated and angled to put light exactly where you want it.
 Stick on templates
 Scene lights
 Aiming the scene lights
Lights!
You didn’t think the LEDs would stop at the roof rack, did you? Traxxas also has light kits for the headlights and tail lights 8084, plus roof and bumper lights. As with the previous builds, the 8028 LED power supply is used to regulate LED voltage. The headlight and taillight kit includes a complete grille and tailgate panel with clear lenses, junction block, and all the brackets required for a rugged mount. Installation requires openings to be cut in the body, and templates are provided to get the placement just right. Or, you can get a pre-cut body with the openings already made for you at the factory. Just order 8111R, and you’ll also get window masks and a full set of decals.
 LED light bar
 Roof light bar mounted
 TRX-4 Sport LED light kit
Stick-on templates show where to cut the openings for the light buckets. We made holes in the corners of the openings with the body reamer 3433, then used a hobby knife with a fresh blade to connect the holes along the straight sides of the openings. Don’t try to saw through the plastic; just score it so you can peel out the waste plastic along the score lines. It’s a bit of work to trim the light openings (best tip: take your time), but the results are worth it.
 Grille templates
 Apply the template
 Installed grille
That's the end of our competition build! Now it's time to grab some batteries and test this truck's mettle out on the trail. We'll be looking for the toughest, gnarliest climb we can find. Stay tuned to see how well it performs.

Get your wrench on, and show us how your TRX-4 turned out! Post your pics to Facebook, Instagram or Twitter with #MyTRX4Build, and we’ll be sure to share some of our favorites.