
 Canadian Dollar (CAD)
 Euro (EUR)
Part 2: Adding Velineon Brushless Power
If you’re running a relatively stock TRX-4®, get ready to start wrenching! If your TRX-4 sports a full LED kit, upgraded brushless servo, and other trick parts, you’ll need to upgrade to the High-Output BEC kit (2262) to handle those high-voltage loads. You can either tap your battery leads directly, or in our case, we’re using the VXL-3s speed control from a Slash® with the On-Board Audio system. This special version of the VXL-3s offers a second set of high-voltage leads which we’ll use for the BEC. Don’t use the fan output from the standard VXL-3s to power the BEC. It’s meant only for low-draw loads. Let’s get this swap started…


| |
| Part 2 Build List |
| |
| |
| |
View the Full Line of Bronco Accessories
Installing the Velineon System
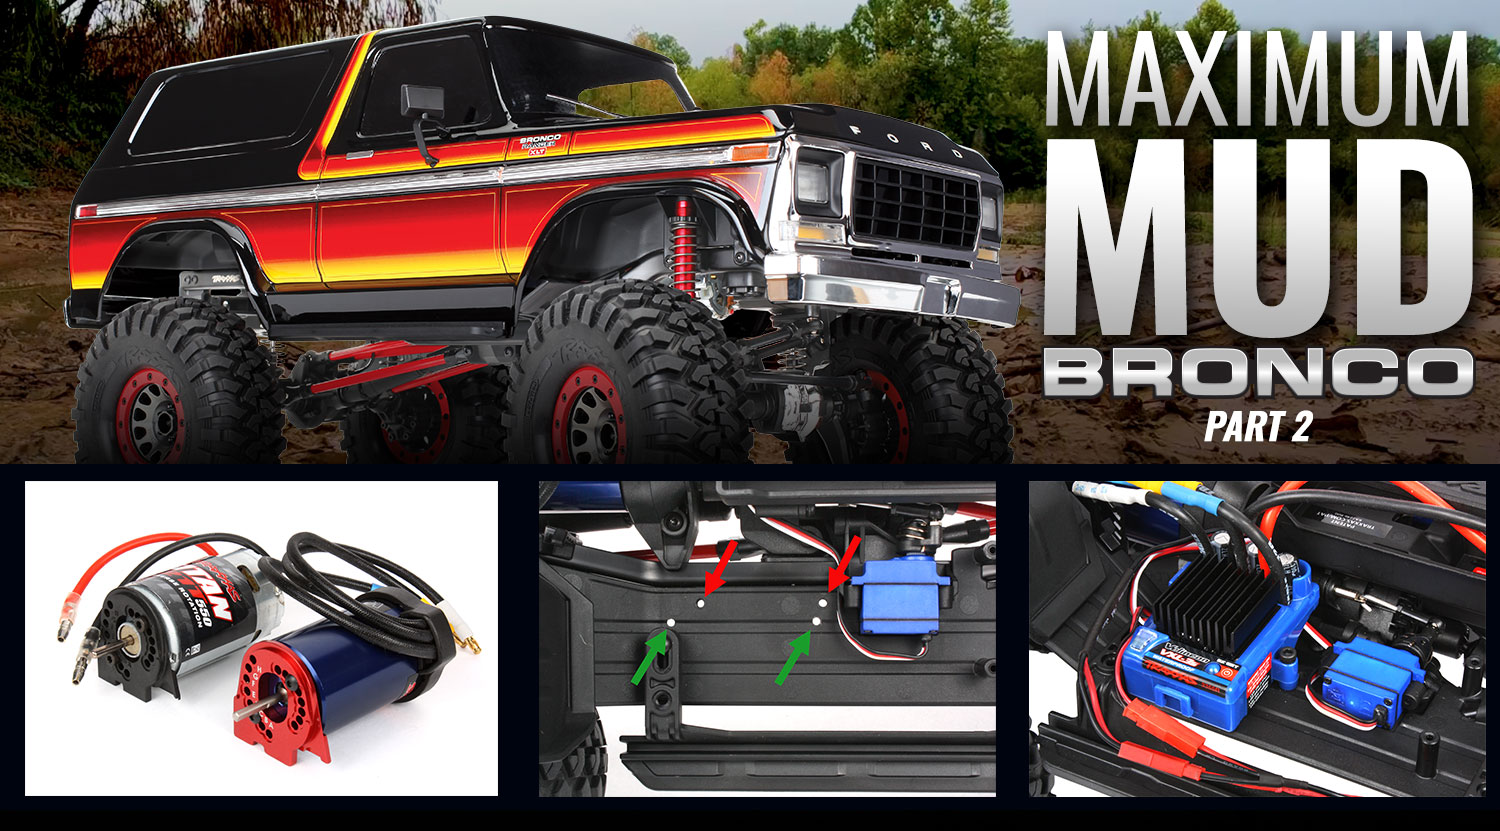
The 3350R Velineon power system includes the VXL-3s speed control and 3500 Kv motor. There’s also a mounting plate in the box, which we won’t need for the TRX-4. First things first, we need to remove the stock XL-5™ speed control and Titan® 21T motor. The speed control is held by two screws, and the motor comes out simply be removing the three screws that secure the gear cover.
 Remove the screws
Since we’ll be installing the 10T pinion included with the Lift Kit and we’ve got a sweet red-anodized aluminum motor plate to replace the stock plastic part, all we need to carry over from the original brushed setup are the motor-mounting screws. The motor plate’s A position will correctly set gear mesh with the 10T pinion.


The VXL-3s speed control is wider than the XL-5, so the factory mounting points don’t line up. You could just tape the speed control into place using the mounting tape included with the Velineon system, or you can drill two new 3/32″ mounting holes, like we did (the photo shows the factory holes (red arrows) and the new holes for the VXL-3s (green arrows) Square up the speed control against the rock-slider mount, then pass your 3/32″ drill bit through each hole and give it a twist to mark the hole locations. Remove the speed control, drill the holes, and use the supplied screws to mount the speed control.
 Drill the new holes
And here’s the installed speed control—looks factory! To finish the job, we’ll need to get into the receiver box and plug the speed control into the receiver. While we’re in there, we’ll install the 2262 High-Output BEC kit, since our mud-Bronco has the High-Torque 400 servo and connect it to the high-voltage connector on the speed control.
 Installed speed control
See Part 1 of our Mud Bronco build for all our driveline upgrades and lift kit installation.
We’re almost finished! Jump to Part 3 to see our Maximum Mud build outfitted with a full LED light kit.
Get your wrench on, and show us how your lifted TRX-4 turned out! Post your pics to Facebook, Instagram or Twitter with #MyTRX4Build, and we’ll be sure to share some of our favorites.