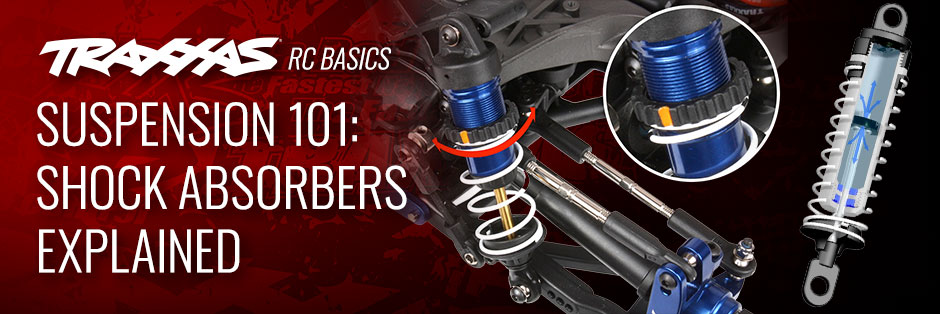
Part 1 of Our Traxxas Shock Rebuild Series
When to Rebuild
The seals that hold the oil inside of any shock are consumable parts that require periodic replacement. Shafts and pistons wear out too, but less quickly. Seal life varies with surface type and terrain, so there’s no fixed service interval. Shocks subjected to harsh terrain and dusty, gritty surfaces will wear seals out more rapidly than the shocks on a model that operates in smoother, cleaner conditions. Regular inspection is key; rebuild if you discover any of the shocks:
- Are very wet where the shaft exits the body, or you can see oil has leaked out of the shock
- Have scored, scratched, or bent shafts
- Feel rough, lumpy, or otherwise not-smooth when compressed with the spring removed
It’s good practice to rebuild all the shocks together, even if only one or two shocks seems to be in need. Rebuild kits are inexpensive, and you’ll be assured all the shocks are operating equally well.

The 2362 rebuild kit includes seals, spacers, e-clips and diaphragms for two Ultra Shocks. The kit also works with Big Bore shocks, which use the c-clips and clear spacers.
| |
| Required Parts and Tools |
| Optional Items |
| |
| |
Step 1: Remove the shocks
Take out the screws that secure the shocks to the arms and shock towers. Depending on your model, you may need a 2.5 mm or 2 mm hex driver, or a #2 Phillips screwdriver to remove the screws. Tip: reinsert the screws into the arms and towers so you won’t be wondering which holes they go into later.

Depending on your model, you may find it easier to access the lower shock-mounting screws using a ball-end driver. Click here to learn about ball-end drivers.
Step 2: Remove the spring retainer, spring, and upper retainer
Pull the spring up to take tension off the retainer, then lift the retainer off of the rod end and slip it off of the shock shaft. With the retainer removed, you can slide the spring, upper retainer, and any preload spacers off the shock.
 The spring retainer’s slot allows it to slide past the shock shaft.
Step 3: Remove the cap and drain the shock
You should be able to spin the cap off with your fingers. If it’s stubborn, pass a driver shaft through the screw hole in the cap to give yourself extra leverage. After removing the cap, you may find the diaphragm sitting on top of the shock body or stuck inside the cap.
 Use a driver to help remove a stubborn cap.
 Remove the diaphragm. It may be on top of the body.
If the diaphragm remains in the cap and you can’t pop it out with a fingernail, use a screwdriver. (The rebuild kit includes new diaphragms, so don’t worry about damaging the old ones.) Empty the shock oil into a disposable cup as you move the shock shaft through the body to help expel as much of the old oil as you can.

Use a screwdriver to pop out a diaphragm that's stuck in the cap.

Drain the shock and discard the oil into the disposable cup.
Step 4: Remove the rod end and shock shaft
The rod end simply unscrews from the shock shaft. You’ll need to hold the shock shaft to prevent it from turning, but it’s important not to grab the shaft with bare pliers, as this will damage the shaft’s smooth chrome finish and cause the shocks to leak. Here are two ways to hold the shaft without marring it:
Method 1
Side cutters (also known as diagonal cutters). Use the thin jaws to grab the shaft just above the rod end. Any marks on the shaft will be hidden by the spring retainer when the shock is reassembled.
Method 2
Pad the shock shaft with tape. Painters’ tape and electrical tape both work well for this. Wrap about five inches of tape around the shaft to build up a thick pad, then squeeze tightly with pliers. The jaws may cut through a layer or two of tape, but won’t reach the shaft.
 Use side-cutters to grip the shaft just above the rod end.
 Build up a thick pad of tape to protect the shaft.
With the rod end removed, push the shock shaft up through the body. Depending on your model, there may be a spacer installed on the shaft (as seen here). If a spacer doesn’t come out with the shock shaft, look inside to make sure there isn’t one left in the shock.
Step 5: Remove the lower cap, seals, and seal spacer
The cap will unscrew easily with your fingers. After removing the cap, use the tip of a driver to remove the blue X-ring seals and the spacer between them. You can discard the seals and spacer, we’ll install the fresh parts from the rebuild kit next.
 Remove the lower cap, then coax the seals and seal spacer out.
Step 6: Lubricate and install the new X-ring seals
Coat the new seals with shock oil, then insert them into the shock body with the spacer in between the seals. To avoid oily hands, place the seals in a plastic bag with a few drops of shock oil and smoosh them around from outside the bag. Reinstall the shock cap.
 The rebuild kit includes low-friction white spacers.
 Coat the seals with shock oil before installing them.
Step 7: Optional - Replace the piston and shaft
You don’t need to replace the shock piston with each rebuild, as plastic sliding against plastic in an oil bath doesn’t create a lot of wear. Likewise, the steel shaft should outlast many seals. But if the piston fit is sloppy (or you want to swap the 2-hole pistons for 3-hole, or vice-versa), or the shafts are damaged or scuffed and no longer have their shine (which makes them prone to weeping oil), the parts are easy to replace. Use a flat-blade screwdriver with a 1/8″ tip to pop the e-clip off the end of the shock shaft and release the piston. Use a new e-clip from the 2362 rebuild kit to secure the new piston. If you’re replacing a shaft, install the lower e-clip first, then the piston, then the top e-clip. If your model is ready for new shafts, consider upgrading to titanium-nitride coated hardened steel shafts. The slick TiN finish reduces friction and extends wear, and the shafts are stronger than stock.

Twist the screwdriver to pop off the e-clip. To prevent the clip from flying across the room, aim it at a rag or into a cup.
 Use needle-nose pliers to install a fresh e-clip.
 Titanium-nitride shafts reduce friction and extend wear.
Step 8: Reinstall the shock shaft and rod end
Lubricate the shock shaft’s threads with shock oil to help them pass through the seals more easily, and un-thread the lower cap one turn so there’s no pressure on the seals. Slide the shock shaft through the shock body. Don’t forget the spacer that goes under the piston if your shock requires one. Thread the rod end back onto the shaft and tighten the lower cap. The shock is ready for filling.

Lubricate the shaft’s threads so they’ll pass through the seals more easily.

Remember not to grab the shock shaft with bare pliers when you reinstall the rod end.
Step 9: Refill the shock
This step has is actually a few steps. Proper filling is essential to peak shock performance, so take the few extra minutes required to do the job properly.

Step A
With the shock shaft fully extended, fill the shock until it is about 3mm below the top of the body.
Step B
Slowly cycle the shock shaft up and down to release any air bubbles trapped in or below the piston. When all the air bubbles have been released into the oil, set the shock aside to give the bubbles time to dissipate. (While you wait, you can move onto rebuilding the next shock.)
Step C
After the bubbles are gone, push the shock shaft into the body until this piston reaches the top of the oil. Add oil until the level is about 1.5mm from the top of the shock body.
Step D
Insert the new diaphragm included with the rebuild kit. Some oil will be displaced, which is fine.
Step E
Install the shock cap and tighten it until it meets the shock body. Snug is all you need, don’t overdo it.

Top Tip: Use pliers with a rubber band around the handle to hold the shock upright while you wait for the air bubbles to dissipate.

The hollow-ball caps (left) allow greater freedom of movement and resist popping off in a crash.

A set of four caps will only cost you $5. Don't forget the hardware!
If your model has the older shock cap design that mounts to the tower with shoulder screws, you can upgrade to the latest 8361 caps with hollow balls. The hollow-ball caps allow greater freedom of movement, resist popping off in a crash, and won’t loosen their mounting screws like shoulder-screws sometimes do. A set of four caps will only cost you five bucks. Hardware is sold separately, you’ll need 3x14 mm button-head screws (2593).
Step 10: Check rebound
Press the shock shaft all the way in, so the rod end meets the body. Release the shaft, and note how far the shaft extends on its own. It should extend to between one-third and one-half of full extension. If the rod end won’t reach the body, or you feel a lot of resistance as the rod end reaches the body, then there’s too much oil in the shock. Loosen the cap and compress the shock to push 2-3 drops out, retighten the cap, and test rebound again. If the shaft doesn’t rebound at all, or you can feel air bubbles in the oil, add a few drops of oil. Repeat until the shock rebounds correctly, and you can cycle the shock shaft in and out without hearing or feeling bubbles in the oil.

The shaft should extend to between one-third and one-half of full extension.

Fully compress the shock and then let go to check rebound.
Step 11: Reinstall the shock
Just line up the shock over its mounting holes and put the screws back in. Repeat the process for the remaining three units, and your Traxxas machine’s Ultra Shock suspension will be ultra-smooth once again.
 One down, three to go!
Coming Up in Part 2: How to rebuild Big Bore aluminum-body shocks


 Canadian Dollar (CAD)
 Euro (EUR)

