
 Canadian Dollar (CAD)
 Euro (EUR)
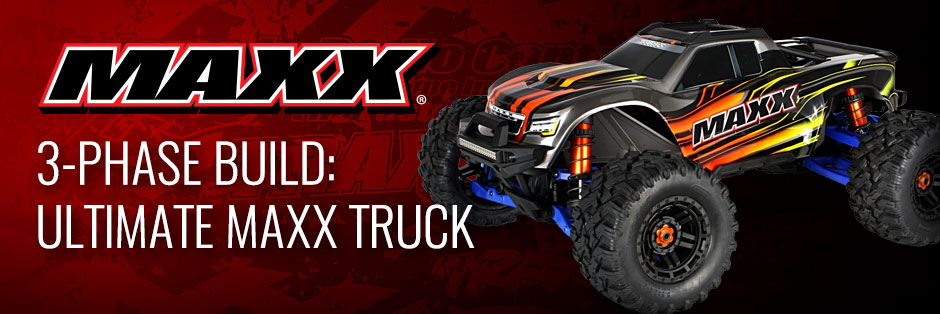
How to Get the Most Performance from Your Maxx

Traxxas 8712 Tool Kit
You can use the tool kit that comes with the Maxx to install all the parts in this article, but upgrading your tools can be just as important as your vehicle modifications. The Traxxas 8712 tool kit includes premium hex bits and nut drivers to perform upgrades or maintenance on your Traxxas model. The kit also includes an overmolded grip and convenient embroidered storage case.
PHASE 1: WideMaxx Suspension & Aluminum Upgrades
| |
| Parts List |
| |
| |
| |
We’ll start things off by adding the WideMaxx suspension kit to our original Maxx. If you already have the new Maxx, you can skip this step and move on to the aluminum upgrades. We’re installing the blue version, you can also get the kit in black, red, orange, and green. The longer WideMaxx arms increase the original Maxx’s track width by 40 mm, an 11% increase that let’s you push the big rig even harder and stay shiny-side up. Click here to see how to install the kit.

The WideMaxx kit includes everything you need

It’s easy to see the extra length of the blue WideMaxx arms

Use the blue-stripe springs on the rear and move the rears up front
We’re also adding blue-anodized aluminum steering and caster blocks, and rear axle carriers. They’re even stronger than the factory composite parts, and they look fantastic. For contrasting color, we're replacing the fixed-length front toe links with TUBES turnbuckles, which allow infinite toe-in tuning and really pop with their orange anodizing.

The aluminum parts boost durability and style

The TUBES links make it easy to adjust toe-in

All that metal looks amazing

Orange and blue is a great combination

The WideMaxx's wider footprint improves stability
Phase 2: Center Differential & Steel Driveshafts
| |
| Parts List |
| |
| |
| |
We're trading out the Maxx’s factory telescoping driveshafts for the optional steel CV-style shafts. These are even stronger and transfer power more efficiently under load. The steel driveshafts are available in standard length for original Maxx trucks without the WideMaxx kit. For this build and the newer Maxx trucks, you'll need the wider driveshafts. You can read the full installation how-to here. The CV axles are designed for use with the optional 17 mm hubs and nuts, which you can get in orange, blue, red, green, and black.

The CV shaft set includes new bearings and screw pins

The new steel shafts are both thinner and stronger

The steel shafts require 17 mm hubs and nuts
We’re replacing the stock Torque Biasing Center Drive with the 8980 metal center differential. This upgraded unit comes fully assembled with the same heavyweight oil as the stock one, but you can always tune its performance with a lighter weight oil. The differential’s rugged alloy housing sheds heat and resists flex for lasting performance and durability.
 The differential's alloy case sheds heat and resists flex
 Install the differential from undereath the chassis
PHASE 3: LED Lights, Sledgehammer Tires & ProGraphix Body
| |
| Parts List |
| |
| |
| |
Now we’ll give our Maxx a dramatically different look and a blazing set of LED lights for after-dark action. The High-Intensity LED Light Kit is a really trick setup, and features a power amplifier that plugs directly into the speed control for steady light output regardless of battery voltage, with no draw on the receiver.
 Maxx LED light kit
 Everything is included
 Swap out the stock bumpers
The system installs very quickly and easily: just bolt the power amplifier to the bosses in the chassis, replace the stock bumpers with the LED-equipped units, and plug the connectors in. Everything is customized for a perfect fit.

Activate the lights with the Mode Select button or the Traxxas Link app

Traxxas Link gives you a dedicated Lights button on the dashboard
 The rear LEDs have full brake and reverse light functionality and respond to trigger inputs
There’s no shortage of style with the Maxx’s factory color combos, but if you prefer to choose your own hues, you’ve got options. You can get a clear Maxx body in original or heavy duty thickness and go to town with masking and painting your own design, or get a ProGraphix body that arrives with graphics in place awaiting your final color. We chose the latter, and hit it with an orange-yellow fade. If you have the newer Maxx, be sure to choose a body for the longer 352 mm wheelbase. There’s no skill required: just spray the orange as far as you want it to go, then spray the yellow right over it. Finish with a backing of white to make the colors opaque. Remember to use polycarbonate-compatible paint, not regular enamel sprays.

ProGraphix body

We chose orange-yellow fade

Transfer the body support over
The original Maxx’s stock tires measure 5.5 inches in diameter and feature a multi-level tread that works well on all kinds of hard and soft terrain. To give our truck even more aggressive grip and ground clearance, we’re upgrading them to the same Sledgehammer tires found on the new Maxx. These hyper-aggressive tires roll over tough terrain with a moto-style tread and bump diameter up slightly to 5.6 inches. They arrive ready to shred and are TSM Rated for high-power Maxx mayhem.

The Sledgehammer tires (right) are gnarlier than the original treads, and slightly larger in diameter.

The Sledgehammer tires give the original Maxx a wider and more aggressive stance
This is definitely the maximum Maxx! Our project truck is wider, tougher, and taller, and ready for off-road excitement day or night with its high-output LED lighting.

The Maxx is one wild ride! Check out some of our action videos and see for yourself! Click here to watch the latest videos now.